27 Raised Garden Beds DIY Boost Your Gardening Game
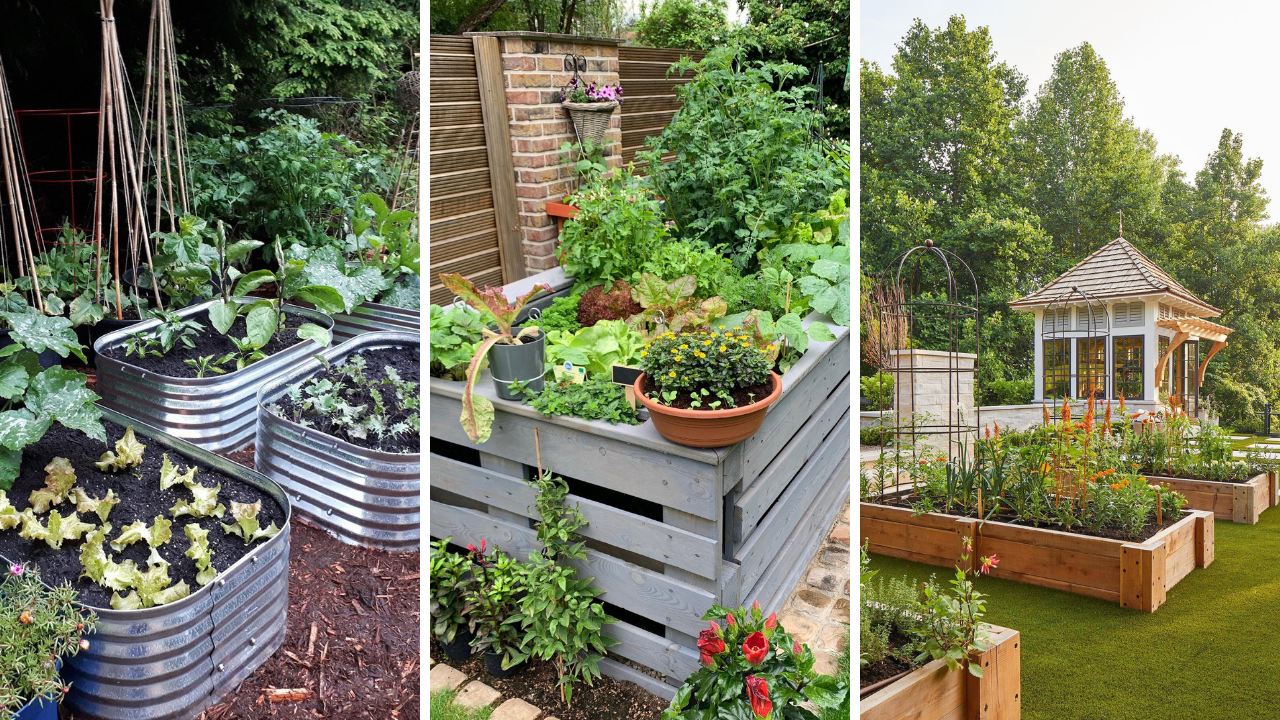
Gardening has always been more than a hobby for me—it’s my therapy, my creative outlet, and my connection to nature. When I first started out, I struggled with traditional gardening. The weeds, the uneven soil, and the constant bending over left me frustrated and exhausted. That all changed when I discovered the magic of raised garden beds. Raised garden beds transformed my gardening experience, and they can do the same for you. Whether you’re a seasoned gardener or just getting started, building your own raised beds can elevate your gardening game—literally and figuratively. Let me take you through 27 DIY raised garden bed ideas that I’ve tried, refined, and fallen in love with. Along the way, I’ll share personal stories, practical tips, and real-life examples to help you create the perfect garden for your space and needs. 1. Cedar Wood Beds Source @chozengardens My first raised garden bed was made from cedar wood, and it’s still one of my favorites. Cedar is naturally rot-resistant, so it lasts for years without the need for chemical treatments. I remember building this bed with my dad on a sunny weekend—a memory I’ll always cherish. Cedar beds are ideal for growing a variety of plants, from vegetables to flowers. The natural oils in cedar not only resist decay but also deter certain pests, making it a practical and aesthetic choice. When working with cedar, I recommend pre-drilling holes to prevent splitting and applying a natural wood sealant to extend its life even further. Over the years, I’ve expanded my cedar beds, experimenting with different sizes and layouts to suit my gardening needs. They’ve become the backbone of my garden. 2. Reclaimed Pallet Beds Source @caevermont If you’re on a budget, reclaimed pallets are an excellent choice. I found a stack of free pallets on a local classifieds site and turned them into rustic raised beds. Just be sure to use heat-treated pallets to avoid any harmful chemicals. Pallet beds are versatile and can be customized to fit any space. I love painting mine with vibrant colors to add a cheerful touch to my garden. One tip: line the inside with landscape fabric to keep the soil from spilling out and to prolong the life of the wood. One summer, I grew an entire crop of cherry tomatoes in my pallet bed, and the rustic look complemented the lush greenery perfectly. 3. Galvanized Metal Troughs Source @rainqueen_sa These are perfect if you want a modern, industrial vibe. I found a few old troughs at a farm auction, drilled drainage holes, and filled them with soil. They’re deep, durable, and add a unique touch to my garden. One of the best things about galvanized metal troughs is their height—no more bending over to tend to your plants! I’ve used these for everything from tomatoes to herbs, and they’ve performed beautifully. Be sure to place them in a sunny spot and add a layer of gravel at the bottom for improved drainage. I’ve also experimented with companion planting in these troughs, grouping basil and tomatoes together with great success. 4. Concrete Blocks Source @t.p_gardens Concrete blocks are a no-nonsense option that’s both affordable and sturdy. I used these to create a U-shaped garden bed, allowing easy access to all plants. Plus, the holes in the blocks are perfect for planting herbs. This design is especially useful if you’re working with limited mobility or want a neat, organized look. To enhance the aesthetic, consider painting the blocks or filling the holes with colorful flowers. My children enjoyed helping me paint the blocks, turning the project into a fun family activity that added personality to our garden. 5. Tiered Wooden Beds Source @maxsgardenboxes When I wanted to maximize space in a small backyard, tiered wooden beds came to the rescue. These beds let you grow more in less space, and they’re a stunning focal point. I built mine with pressure-treated wood and designed it to cascade downward, allowing me to grow root vegetables at the bottom and leafy greens at the top. This setup not only saves space but also creates a visually striking garden feature. I’ve received countless compliments on my tiered beds, especially from visitors who are new to gardening. 6. Corrugated Metal and Wood Beds Source @metalgardenbeds Combining corrugated metal and wood creates a stylish, modern look. I built one of these for my vegetable garden, and it’s become a conversation starter for neighbors and friends. The combination of textures—the sleekness of the metal with the warmth of the wood—adds an elegant touch to any garden. I recommend using treated wood for the frame and sealing the edges of the metal to avoid sharp corners. This design not only looks great but also holds up well against harsh weather conditions. 7. Stone-Walled Beds Source @creativeexteriorsllc For a more natural look, I used stones collected from my property to build raised beds. They’re labor-intensive to construct but incredibly rewarding. Stone beds blend seamlessly into the landscape and retain heat, which can extend your growing season. To build one, I laid the stones in layers, using smaller ones to fill gaps for stability. Over time, moss grows between the stones, giving the bed a charming, aged appearance. These beds have become a haven for pollinators, as the nooks between the stones provide shelter for bees and other beneficial insects. 8. Wine Barrel Beds Source @kennaughs.garden.centre Cutting old wine barrels in half gave me charming, portable garden beds. They’re perfect for small spaces and add a touch of whimsy. I’ve used these for growing strawberries and herbs, and they’ve never failed to impress guests. To keep the barrels from drying out, I recommend lining them with a plastic liner and drilling adequate drainage holes. Over the years, I’ve added decorative touches, like painting the barrels with floral designs, to make them even more eye-catching. 9. Wattle Fencing Beds Source @livingwillowfarm Wattle fencing is an ancient technique that’s as functional as it is beautiful. Using branches from my yard, … Read more